Showing posts with label Brown Sugar. Show all posts

Friday, August 13, 2010

Nick's Peanut Butter Dream Bars

Posted by Laura at 9:50 PM 0 comments
We had a going away party for my coworker Jeff today. He brought ice cream in for all of us, so I (of course) had to bake something. He is as big a peanut butter fan as I am, so I knew this recipe was perfect. The original calls for M&Ms, but I naturally had to use Reese's Pieces to pack in a little more peanut butter.


Nick's Peanut Butter Dream Bars
(Source: Land O Lakes)

2 cups uncooked quick-cooking or old-fashioned oats
1 1/2 cups all-purpose flour
1 cup firmly packed brown sugar
1 tsp baking soda
3/4 tsp salt
1 cup Butter, melted
1 (14-ounce) can sweetened condensed milk
1/2 cup crunchy or creamy peanut butter
1 cup candy-coated chocolate pieces (I used Reece's Pieces)


1. Heat oven to 375°F. Combine oats, flour, brown sugar, baking soda and salt in large bowl; stir until well mixed. Stir in melted butter until moistened.

2. Reserve 1 1/2 cups crumb mixture; press remaining mixture into greased 13x9-inch baking pan. Bake 12 minutes.

3. Meanwhile, combine sweetened condensed milk and peanut butter in small bowl; stir until well mixed. Carefully spread over hot, partially baked crust within 1/4 inch from edge.

4. Combine reserved crumb mixture and candy-coated pieces in small bowl; sprinkle over sweetened condensed milk mixture, pressing down lightly. Bake for 18 to 22 minutes or until golden brown. Cool completely.

Friday, July 16, 2010

Oatmeal Brownie Bars

Posted by Laura at 1:20 PM 1 comments
My coworker Alison is not big into cake, so I had to come up with something else to make for her birthday. I settled on this recipe because she like oatmeal, and oatmeal + brownie = delicious. I served these with scoops of vanilla bean ice cream, and the only thing that could have made these bars better would have been if they we were eating them right out of the oven. The crunchy oatmeal paired perfectly with the brownie layer for a fantastic (and easy!) birthday treat.


Oatmeal Brownie Bars
Source: Land O'Lakes

Oatmeal Layer:
1 1/4 cups all-purpose flour
1 cup uncooked quick-cooking oats
1 cup firmly packed brown sugar
1/2 teaspoon baking soda
1/4 teaspoon salt
2/3 cup cold Butter, cut into chunks

Brownie Layer:
1/3 cup Butter
3 (1-ounce) squares unsweetened baking chocolate, chopped
1 1/4 cups sugar
2 Eggs
2 tablespoons water
1 teaspoon vanilla
1 cup all-purpose flour
1/2 teaspoon baking powder


1. Heat oven to 350°F. Combine all oatmeal layer ingredients in large bowl except butter. Cut in 2/3 cup butter with pastry blender or fork until mixture resembles coarse crumbs. Reserve 1 1/4 cups crumb mixture for topping. Press remaining crumbs into greased 13x9-inch baking pan. Bake 10 minutes.

2. Meanwhile, combine 1/3 cup butter and chocolate in large microwave-safe bowl. Microwave on HIGH (100% power), stirring twice, until chocolate is melted (30 to 60 seconds). Cool slightly.
3. Combine sugar, eggs, water and vanilla in large bowl; beat at medium speed until well mixed. Add melted chocolate mixture; continue beating until well mixed. Reduce speed to low; add 1 cup flour and baking powder. Beat until well mixed.

4. Drop chocolate mixture by tablespoonfuls over warm, partially baked crust. Carefully spread brownie layer evenly over crust; top with reserved crumb mixture.

5. Bake for 15 to 18 minutes or until edges are set. (DO NOT OVERBAKE.) Cool completely; cut into bars.

Saturday, July 10, 2010

Pretzel M&M Cookie Bars

Posted by Laura at 2:22 PM 0 comments
I've experimented with M&Ms before. So I obviously had to make something with the newest M&M:

The M&Ms themselves were quite good. They'd be even better with peanut butter, but everything is better to me with peanut butter. :)

I came across BEB's Chocolate Chip & Pretzel Cookie Bars and new the M&Ms would pair well with the bars since they already included pretzels. I didn't do much to adapt the recipe, other than to cut down on the chocolate chips to make way for the M&Ms. And they were fabulous. And, since I didn't snap any pictures, you'll just have to take my word for it. ;)


Pretzel M&M Cookie Bars
(Source: Adapted from Brown Eyed Baker)

2 cups all-purpose flour
1 tsp baking soda
1/2 tsp salt
1 1/2 sticks unsalted butter, at room temperature
1 cup light brown sugar
1/2 cup granulated sugar
2 large eggs
2 tsp vanilla extract
1 cup semisweet chocolate chips
1 cup Pretzel M&Ms
1/2 cup pretzels, coarsely chopped
1/4 cup chocolate chips, for drizzling (optional)
1/4 cup pretzels, crumbled, for topping (optional)


1. Preheat the oven to 350°F. Spray a 9×13 pan with cooking spray.

2. In a bowl, whisk the flour, baking soda and salt. Using a mixer, beat the butter and both sugars at medium speed until light and fluffy, about 4 minutes. Beat in the eggs and the vanilla extract. On low speed, beat in the dry ingredients just until incorporated. Stir in the chocolate chips and pretzel pieces.

3. Spread the batter evenly in the pan and press it down evenly with a spatula. Bake for 30 minutes, until golden brown. Transfer the pan to a rack and cool completely.

4. In separate sandwich size baggies, melt the chocolate chips and peanut butter. Cut off a small corner on each bag and drizzle the chocolate and peanut butter over the top of the bars. Sprinkle the extra crushed pretzels on top. Let set and then cut into squares.

Makes 32 squares

Sunday, July 4, 2010

Doughnut Muffins

Posted by Laura at 9:40 AM 1 comments
I've seen similar muffins floating around on the internet for months, but never got around to making them until now. This basic muffin is a beat-it-up, cake-type muffin, high-crowned and very "vanilla-looking."


I'll admit, I didn't care for these muffins right out of the oven. The nutmeg was very prominent and I didn't think they tasted particularly doughnut-like. However, by the next day the nutmeg flavor had subsided and I was left with a muffin that did indeed taste like a doughnut. And it was delicious.


Doughnut Muffins

(Source: King Arthur Flour)

Batter:
1/4 cup butter
1/4 cup vegetable oil
1/2 cup granulated sugar
1/3 cup brown sugar
2 large eggs
1 1/2 tsp baking powder
1/4 tsp baking soda
1 to 1 1/4 tsp ground nutmeg, to taste
3/4 tsp salt
1 tsp vanilla extract
2 2/3 cups All-Purpose Flour
1 cup milk

Topping:
3 Tbsp melted butter
3 Tbsp cinnamon sugar


1. Preheat the oven to 425°F. Lightly grease a standard muffin tin. Or line with 12 paper or silicone muffin cups, and grease the cups with non-stick vegetable oil spray; this will ensure that they peel off the muffins nicely.

2. In a medium-sized mixing bowl, cream together the butter, vegetable oil, and sugars till smooth.

3. Add the eggs, beating to combine.

4. Stir in the baking powder, baking soda, nutmeg, salt, and vanilla.

5. Stir the flour into the butter mixture alternately with the milk, beginning and ending with the flour and making sure everything is thoroughly combined.

6. Spoon the batter evenly into the prepared pan, filling the cups nearly full.

7. Bake the muffins for 15 to 17 minutes, or until they're a pale golden brown and a cake tester inserted into the middle of one of the center muffins comes out clean.

8. Remove them from the oven, and let them cool for a couple of minutes, or until you can handle them. While they're cooling, melt the butter for the topping (this is easily done in the microwave).

9. Use a pastry brush to paint the top of each muffin with the butter, then sprinkle with the cinnamon-sugar. Or simply dip the tops of muffins into the melted butter, then roll in the cinnamon-sugar.

10. Serve warm, or cool on a rack and wrap airtight. Store for a day or so at room temperature.


Wednesday, June 16, 2010

Reese's Pieces Chocolate Chip Cookies

Posted by Laura at 6:10 PM 1 comments
When I originally picked these out to make for my coworker Jeff, I though they were peanut butter cookies. I'm not sure why, since clearly they're not. Despite that little self-induced letdown, they were still very good.

Photo courtesy of Jenny @ Picky Palate


Reese's Pieces Chocolate Chip Cookies
(Source: Picky Palate)

1 stick real butter, softened
1/2 cup butter flavored shortening
3/4 cup sugar
3/4 cup brown sugar
2 large eggs
1 1/2 tsp real vanilla
2 cups all purpose flour
1/4 cup ground quick oats (in food processor or blender)
1 tsp baking soda
1 tsp salt
1/2 Bag Reeses Pieces mini baking pieces
1/2 Bag Semi-Sweet chocolate chips (I used mini chocolate chips)


1. Preheat oven to 375°F. Place butter, shortening and sugars in a stand mixer and mix until smooth and creamy. Slowly beat in eggs and vanilla.

2. Place flour, oats, baking soda and salt in a large bowl. Slowly pour into wet mixture on very low speed until just combined. Hand stir in Reeses and chocolate chips.

3. Drop onto an ungreased baking sheet and bake for 9-11 minutes until just golden around edges.


3 dozen cookies

Wednesday, May 19, 2010

Chocolate Chip Cookie Dough Cupcakes

Posted by Laura at 8:05 PM 1 comments
Brown Sugar cupcakes...filled with eggless cookie dough...and topped with cookie dough frosting. Need I say more? These cupcakes are to die for and were a big hit at work for Jeff's birthday. Needless to say, eggless cookie dough is my new best friend and I may have to start making batches of it to have on hand for nibbling.


Chocolate Chip Cookie Dough Cupcakes
Source: Annie's Eats


Brown Sugar Cupcakes:
3 sticks unsalted butter, at room temperature
1 1/2 cups light brown sugar, packed
4 large eggs
2 2/3 cups all-purpose flour
1 tsp baking powder
1 tsp baking soda
1/4 tsp salt
1 cup milk
2 tsp vanilla extract
1 cup chocolate chips (semisweet or bittersweet)

Eggless Cookie Dough Filling:
4 Tbsp unsalted butter, at room temperature
6 Tbsp light brown sugar, packed
1 cup plus 2 tbsp. all-purpose flour
7 oz sweetened condensed milk
1/2 tsp vanilla extract
1/4 cup mini semisweet chocolate chips

Eggless Cookie Dough Frosting:
3 sticks unsalted butter, at room temperature
3/4 cup light brown sugar, packed
3 1/2 cups confectioners’ sugar
1 cup all-purpose flour
3/4 tsp salt
3 Tbsp milk
2 1/2 tsp vanilla extract

For decoration:
Tiny chocolate chip cookies
Mini chocolate chips


To make the cupcakes, preheat the oven to 350° F. Line two cupcake pans with paper liners (24 total). In the bowl of a stand mixer fitted with the paddle attachment, combine the butter and brown sugar. Beat together on medium-high speed until light and fluffy, about 3 minutes. Mix in the eggs one at a time, beating well after each addition and scraping down the sides of the bowl as needed.

Combine the flour, baking powder, baking soda, and salt in a medium bowl. Stir together to blend. Add the dry ingredients to the mixer bowl on low speed, alternating with the milk, beginning and ending with the dry ingredients, mixing each addition just until incorporated. Blend in the vanilla. Fold in the chocolate chips with a spatula.

Divide the batter evenly between the prepared cupcake liners. Bake for 18-20 minutes, until a toothpick inserted in the center comes out clean. Allow to cool in the pan 5-10 minutes, then transfer to a wire rack to cool completely.

To make the cookie dough filling, combine the butter and sugar in a mixing bowl and cream on medium-high speed until light and fluffy, about 2 minutes. Beat in the flour, sweetened condensed milk and vanilla until incorporated and smooth. Stir in the chocolate chips. Cover with plastic wrap and refrigerate until the mixture has firmed up a bit, about an hour.

To fill the cupcakes, cut a cone-shaped portion out of the center of each cupcake. Fill each hole with a chunk of the chilled cookie dough mixture.

To make the frosting, beat together the butter and brown sugar in the bowl of a stand mixer fitted with the paddle attachment until creamy. Mix in the confectioners’ sugar until smooth. Beat in the flour and salt. Mix in the milk and vanilla extract until smooth and well blended.

Frost the filled cupcakes as desired, sprinkling with mini chocolate chips and topping with mini chocolate chip cookies for decoration.

Yield: 24 cupcakes

Monday, May 10, 2010

Brown Sugar Chocolate Chip Cookies

Posted by Laura at 8:25 AM 0 comments
These might just be my new favorite cookies. The texture of these cookies is chewy but not thick and the brown sugar and vanilla give these cookies a flavor that is a little ‘deeper’ than most. The cookies were soft right out of the oven. These were easy to make and will not last long around the house (a sign that this recipe is a keeper)

Also, heed the instructions to remove the cookies from the oven as soon as the outsides are set but the centers are still puffy and soft. Doing so plays a large part in the resulting texture. Cooling the cookies on the baking sheets means they will continue to bake after being taken out of the oven, but without the circulating air of a cooling rack, they will retain their soft texture.


http://bakingblonde.files.wordpress.com/2008/09/sept-021.jpg
Photo courtesy of Bakingblonde


Brown Sugar Chocolate Chip Cookies

1 cup (2 sticks) butter, softened
1 1/2 cups brown sugar
2 eggs
2 tsp vanilla
3 cups flour
3/4 tsp Kosher salt
1 tsp baking soda
1 cup semisweet or milk chocolate chips (I used a mixture of chocolate and peanut butter chips)

1. Preheat oven to 350°F.

2. Mix flour, salt, and baking soda together in medium bowl; set aside.

3. Beat the butter and brown sugar until thoroughly blended. Add eggs, and vanilla and mix to combine. Add dry ingredients and mix just to blend. Gently fold in chips.

4. Place dough onto parchment paper-lined cookie sheet using a scooper. Bake 9-12 minutes (depending on the size of your cookies and your oven) or until cookies are pale golden brown and the outer edges start to harden yet the centers are still soft and puffy.

5. Cool cookies on cookie sheets for 5 minutes. Transfer to cooling rack until cooled completely.

Sunday, April 18, 2010

Chewy Granola Bars

Posted by Laura at 12:09 PM 1 comments
Hi, it's me.

With our overabundance of Girl Scout Cookies and Easter candy, I haven't been in my kitchen much lately. We're still recovering from our sugar high so, while I was eager to get back in the kitchen, I wasn't ready for another sweet treat. The solution?

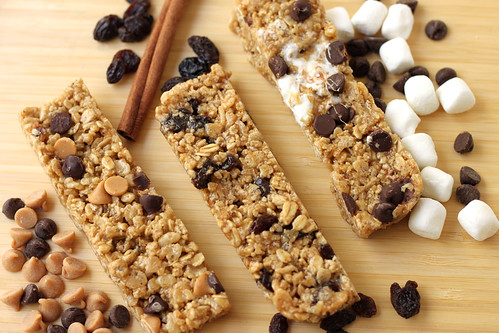
Chewy Granola Bars.


Chewy Granola Bars

These granola bars are boasted to taste exactly like the Quaker Chewy Granola Bars, and I'll admit they were pretty close. The outside of mine turned out sticky-crunchy (I think that maybe had something to do with the honey?) with a chewy center. They were good, but not as chewy as I would have hoped. At any rate, I will definitely be trying these out again.

Note about Granola: The original recipe recommends this granola, which I had a really hard time finding. I’ve never bought granola before, but I eventually found it in the Organic Foods section at Rainbow.


Peanut Butter Chocolate Chip Chewy Granola Bars
(Source: Adapted from Rachel Ray)

4 Tbsp (1/2 stick) unsalted butter
1/2 cup packed light brown sugar
1/4 cup honey
2 cups plain granola
1 cup rice cereal
1/4 cup semisweet chocolate chips
1/4 cup peanut butter chips


1. Combine honey and butter in a medium saucepan over medium-high heat. Stir in brown sugar after butter starts to melt.

2. Bring the mixture to a boil, then lower the heat to medium-low and simmer until the sugar dissolves, about 2 minutes. Remove the saucepan from the heat.

3. Add the granola and rice cereal into the saucepan and fold them into the sauce until evenly coated.

4. Spread the mixture into a 9×13 inch ungreased baking pan and press firmly with a spatula to evenly fill. Sprinkle the chocolate and peanut butter chips onto the top of the granola and gently press them down.

5. Put the pan in the refrigerator until cooled and firm, about 15 minutes, then cut into bars.

18 servings

Tuesday, March 30, 2010

Reese's Peanut Butter Egg Cookies

Posted by Laura at 2:11 PM 0 comments
I adore Reese's Peanut Butter Cups, and Reese's Eggs are even better because, well, there's even more peanut-buttery goodness packed inside every egg! These cookies were absolutely to die for. My eggs were at room temperature, so they broke up quite a bit when they got mixed in to the cookie dough, so I would recommend popping them in the fridge if you want them to retain their shape in the cookies. Personally, I don't think you can go wrong either way, but to each his own.

I snapped some pictures of the prep (I'll post them later) but totally forgot to take pictures of the final product! Check out Picky Palate for more mouthwatering photos, like the one below, of these awesome cookies! (Looking at her photos makes me realize I need some fun plates and bowls to add some much needed variety to the pictures of my plated my desserts.)

Photo courtesy of Jenny @ Picky Palate

Reese's Peanut Butter Egg Cookies
(Source: Picky Palate)

2 sticks softened butter
1 Cup packed brown sugar
1 Cup granulated sugar
3 Tablespoons corn syrup
2 large eggs plus 1 egg white
1 Tablespoon pure vanilla extract
3 1/2 Cups all purpose flour
1 1/4 teaspoon baking soda
1/2 teaspoon salt
3 Cups chopped Reese's Peanut Butter Eggs, 12 total eggs


1. Preheat oven to 350°F. In a stand or electric mixer beat the butter, sugars and corn syrup until well combined….light and fluffy. Beat in eggs and vanilla until well combined.

2. In a large bowl, mix the flour, baking soda and salt. Slowly add to wet ingredients along with the chopped Reese's Peanut Butter Eggs. Mix only until just combined. Using a medium cookie scoop, scoop dough onto a silpat or parchment lined baking sheet. Bake for 9-11 minutes until just turning golden around edges. Let cookies cool for 5 minutes before transferring to a cooling rack. Eat with tall glass of milk!!

Make approximately 4 dozen (delicious!) cookies.

Monday, March 1, 2010

Peanut Butter-Oatmeal Chocolate Chip Cookies

Posted by Laura at 6:40 AM 1 comments
Happy National Peanut Butter Lover’s Day!

Soft and tender from the peanut butter, a slight toasted flavor from the oats and just the right amount of sweetness from the chocolate chips. Definitely not your typical oatmeal cookie, as only 1/2 cup of oats is used in the dough, but they are still amazing!


Peanut Butter-Oatmeal Chocolate Chip Cookies
(Source: Brown Eyed Baker)

1 cup all-purpose flour
1 teaspoon baking soda
1/4 teaspoon salt
1 stick (1/2 cup) unsalted butter, at room temperature
1/2 cup creamy peanut butter
1/2 cup granulated sugar
1/3 cup light brown sugar
1/2 teaspoon vanilla extract
1 egg
1/2 cup rolled oats
1 cup semisweet chocolate chips


1. Preheat oven to 350F. Line two baking sheets with parchment paper and set aside.

2. Whisk together the flour, baking soda and salt; set aside.

3. On medium speed, cream together the butter, peanut butter, granulated sugar, brown sugar and vanilla extract, about 3 minutes. Add the egg and beat to combine. On low speed, gradually add the flour until just combined. Stir in the oats, and then the chocolate chips.

4. Use a large cookie scoop (3 tablespoons) and drop dough onto prepared baking sheets about 2 inches apart. Bake for 10 minutes, or until the cookies are lightly golden. Cool completely on the baking sheet and then store in an airtight container at room temperature.


Makes about 16 cookies

Sunday, January 31, 2010

Peanut Butter Chocolate Chip Muffins

Posted by Laura at 6:11 PM 1 comments
I'm a big peanut butter-chocolate fiend, so I was really excited to try these muffins. Overall, I was a little disappointed in them. Their big, puffy domes were beautiful, but I just wasn't really impressed by the flavor. Yes, they're peanut buttery and yes, they've got yummy chocolate bits, so by all accounts I should have been wild about them. But I wasn't, and I think maybe it is the texture. Most muffins are light and fluffy. These were dense and I also think the bottoms got a little overdone. Andrew liked them, but I don't know that I'll make them again.


Peanut Butter Chocolate Chip Muffins
(Source: Annie's Eats)

2 1/4 cups all-purpose flour
2 tsp baking powder
1/2 tsp salt
2/3 cup brown sugar
6 Tbsp butter, melted and cooled
1/2 cup peanut butter
2 large eggs
1 cup milk
3/4 cup chocolate chips


1. Preheat oven to 375°. Line a muffin pan with 12 paper liners. (I greased my muffin cups instead)

2. In a medium bowl, whisk together the flour, baking powder, salt and brown sugar. Set aside.

3. In a large bowl, whisk together the melted butter, peanut butter, eggs and milk until smooth. Add in the flour mixture and stir until just combined. Stir in chocolate chips. Divide batter evenly between prepared muffin tins, filling each to the top.

4. Bake for 17-20 minutes or until a toothpick inserted in the center comes out clean. Allow to cool for 5 minutes in the pan, then remove to a wire rack to cool completely.

Sunday, January 17, 2010

Cherry Oatmeal Cookies

Posted by Laura at 10:35 AM 0 comments
I came across a bag of cherry morsels when I was cleaning out the kitchen cabinets and decided it was time to use them or lose them. When I hopped on the internet to look for recipes, there really weren't very many out there. I settled on this one, and I really wasn't sure how they'd turn out. Surprisingly, the cookies were actually quite good. The cinnamon and cherry flavors worked well together, and the oats added a nice texture to the cookie.


Cherry Oatmeal Cookies
(Source: Taste of Home)

1 cup butter, softened
1 cup packed brown sugar
1/2 cup sugar
2 eggs
1 teaspoon vanilla extract
3 cups old-fashioned oats
1-1/2 cups all-purpose flour
1 teaspoon baking soda
1 teaspoon ground cinnamon
1/2 teaspoon salt
1 package (10 ounces) cherry chips


1. In a large bowl, cream butter and sugars until light and fluffy. Beat in eggs and vanilla. Combine the oats, flour, baking soda, cinnamon and salt; gradually add to creamed mixture and mix well. Stir in chips and walnuts.

2. Drop by tablespoonfuls 3 in. apart onto ungreased baking sheets. Bake at 350° for 8-10 minutes or until lightly browned. Cool for 2 minutes before removing to wire racks.

Makes about 4 dozen.

Sunday, December 20, 2009

On the Twelfth Day of Cookies...

Posted by Laura at 11:17 AM 2 comments
I am so proud of these bad boys. This was my first time working with royal icing, and it went really well! I found Brown Eyed Baker's guide to decorating cookies extremely helpful through the whole process. Using royal icing, though time consuming, is quite easy and totally worth the extra effort. My only complaint was that my hand started cramping up after using the piping bags for awhile, but it was well worth it to get such professional looking cookies. I think it's safe to say my cookies will never look like this again! And, if you were wondering, the cookies themselves taste amazing! The little bit of cinnamon in the dough is just brilliant and really gives them an added boost of flavor.


Cinnamon Sugar Cookies

(Source: Smells Like Home)

4 cups sifted all-purpose flour
1 teaspoon baking powder
1/2 teaspoon salt
3/4 teaspoon ground cinnamon
1 cup (2 sticks) unsalted butter, room temperature
2 cups granulated sugar
2 large eggs
2 teaspoons pure vanilla extract

1. Sift flour, baking powder, salt, and cinnamon into a bowl.

2. Put butter and sugar in the bowl of an electric mixer fitted with the paddle attachment. Mix on medium speed until pale and fluffy. Mix in eggs and vanilla. Reduce speed to low. Gradually mix in flour mixture. Divide dough into quarters; flatten each quarter into a disk. Wrap each in plastic. Refrigerate until firm, at least 1 hour or overnight.

3. Preheat oven to 325°F with racks in upper and lower thirds. Let one disk of dough stand at room temperature just until soft enough to roll, about 10 minutes. Roll out dough between two pieces of plastic wrap to 1/4-inch thickness. Remove top layer of plastic wrap. Cut out cookies with a 4-to-5-inch cookie cutter. Transfer cookie dough on plastic wrap to a baking sheet. Transfer baking sheet to freezer, and freeze until very firm, about 15 minutes. Remove baking sheet from freezer, and transfer shapes to baking sheets lined with nonstick baking mats. Roll out scraps, and repeat. Repeat with remaining disk of dough.

4. Bake, switching positions of sheets and rotating halfway through, until edges are almost golden, 14 minutes. Let cool on sheets on wire racks.


Royal Icing
(Source: Smells Like Home)

4 cups powdered sugar, sifted
2 tbsp meringue powder
4 1/2 tbsp water
1/2 tbsp pure vanilla extract


1. Combine all ingredients in the bowl of a stand mixer fitted with the paddle attachment. Mix on low speed until the sheen has disappeared and the icing has a matte appearance (about 7-10 minutes). Transfer the contents of the mixing bowl to an air-tight container. This will be the stiffest consistency of the icing, and at this point it is still too stiff to use for decorating. Add water a very small amount at a time and stir by hand until fully incorporated. Continue until the icing has reached a consistency appropriate for piping. (Remember, if you are having any difficulty piping, it is still too thick. Add a little more liquid and try again.) Using a pastry bag, pipe around the edges of each cookie. Let stand so the icing will set. Make sure to keep the leftover icing covered at all times when not in use so that it does not begin to harden.

2. Once all the cookies have been edged, transfer some of the remaining icing to a separate air-tight container. Thin out by incorporating a small amount of water at a time, until the icing drips off the spoon easily when lifted and then smooths in with that still in the bowl. If you go too far and the icing is too thin, add more sifted powdered sugar to thicken it again. Once the icing has reached the desired consistency, transfer it to a squeeze bottle (or a plastic bag with a hole in one corner), and flood the area surrounded by the piping on each cookie. If it does not completely spread to the edges, use a toothpick to help it along. Allow to set.


Saturday, December 19, 2009

On the Eleventh Day of Cookies...

Posted by Laura at 2:17 PM 1 comments
I was originally going to make Martha Stewart's Chocolate Gingerbread Bars, but I realized at the last minute that I forgot to buy sour cream and had to quickly come up with something else along the same line. After doing a quick search online, I found this recipe and it was a done deal. These bars are moist with the perfect amount of spiciness.


Gingerbread Bars
(Source: Culinary in the Desert Country)

2 cups all-purpose flour, divided
2 teaspoons ginger
1 teaspoon cinnamon
1/4 teaspoon fresh grated nutmeg
1/4 teaspoon ground cloves
1/2 teaspoon baking soda
1/2 teaspoon salt
10 tablespoons unsalted butter, softened
3/4 cup packed dark brown sugar
1/2 cup granulated sugar, divided
2 large eggs
1 teaspoon vanilla
1/4 cup molasses


1. Preheat oven to 350°F.

2. In a medium bowl, add flour - scoop out 2 tablespoons of the flour and place into a small bowl to reserve for layer.

3. Into the flour, whisk in ginger, cinnamon, nutmeg, cloves, baking soda and salt.

4. In a large mixing bowl, beat together butter, brown sugar and 6 tablespoons granulated sugar. Add eggs, one at a time, beating until combined after each. Mix in vanilla and molasses. Add dry ingredients and mix just until combined.

5. Scoop batter into a 10 x 15 baking pan coated with cooking spray, spreading the top smooth with an off-set spatula. Sift reserved 2 tablespoons flour evenly over batter, then sprinkle with remaining 2 tablespoons sugar.

6. Place into the oven and bake until the bars are golden brown and a toothpick placed into the center comes out mostly clean with a few moist crumbs attached, about 20 to 24 minutes. Remove and place pan on a wire rack to cool completely before cutting.

Makes about 24 to 32 bars.

Thursday, December 17, 2009

On the Ninth Day of Cookies...

Posted by Laura at 8:17 PM 0 comments
My husband loved these cookies (he ate like five of them fresh out of the oven), but I was a little disappointed in how they turned out. They were very crispy around the edges and very, very flat (thin). But I guess appearances aren't everything because they do taste very good and the mint flavor of the Mint Chocolate M&Ms is quite noticeable.


Minty M&M Cookies
(Adapted from Joy of Baking)

2 cups all purpose flour
1 1/4 tsp baking soda
1/4 tsp salt
3/4 cup unsalted butter, room temperature
2/3 cup granulated white sugar
2/3 cup firmly packed light brown sugar
1 large egg
1 large egg yolk
1 1/2 tsp pure vanilla extract
1 cup Mint Chocolate M&M's


1. Preheat oven to 350°F.

2. In a large bowl, whisk together the flour, baking soda, and salt.

3. In the bowl of your electric mixer (or with a hand mixer), cream the butter and sugars until light and fluffy (about 2 - 3 minutes). Scrape down the sides of the bowl. Add the egg and egg yolk, beating until well combined. Beat in the vanilla extract.

4. Gradually add the flour mixture to the creamed mixture and beat just until incorporated. Scrape down the sides of the bowl as needed.

5. Form dough into balls. Gently flatten each ball of dough. Completely cover the tops of the cookies with the M&M's. Gently press the candies into the dough. Bake the cookies for 7-10 minutes, rotating the baking sheets halfway through the baking time. The cookies are done when they are light golden brown in color and just set. They will still seem a little soft but they will firm up as they cool. Remove from oven and let the cookies cool a few minutes on the baking sheet before transferring them to a wire rack to cool.

Tuesday, December 15, 2009

On the Seventh Day of Cookies...

Posted by Laura at 9:16 PM 0 comments
These cookie tartlets are quick and easy and very tasty. The crushed candy canes give it an extra crunch and a boost of flavor reminiscent of Christmas.


Peppermint Bark Cookie Tartlets
(Source: Nestle Toll House)

1 package Refrigerated Sugar Cookie Dough, slightly softened
1/3 cup plus 1 tablespoon all-purpose flour
1/2 cup White Chocolate Chips
1/2 cup finely crushed candy canes

1. Preheat oven to 325°F.

2. Combine cookie dough and flour in large mixing bowl. Divide dough into 24, 1 1/4-inch balls. Press dough into mini-muffin cups.

3. Bake for 10 minutes or until light golden brown around edges and puffy.

4. Remove tartlets from oven and immediately fill with morsels and crushed candy canes. Cool for 10 minutes in muffin cups. Carefully remove to wire rack, do not invert; cool completely.

Saturday, December 12, 2009

On the Fifth Day of Cookies...

Posted by Laura at 1:16 PM 0 comments
Another classic cookie recipe that just cannot be left out. Trees, poinsettias, wreaths, and ribbon have been a part of my holiday season for as long as I can remember. Be sure to watch these cookies very carefully while baking as they can go from perfect to burnt in a matter of seconds. The cookies should be removed from the oven as soon as the edges begin to turn a little brown.


Spritz Cookies

(Source: An old family recipe)

1 cup butter
1 cup sugar
1 1/2 tsp vanilla
2 eggs
3 cups flour
1/2 tsp salt

1. Cream butter, sugar, and vanilla.

2. Add eggs and beat well.

3. Sift flour and salt together; add in three additions, mixing well after each addition.

4. Place dough in cookie press. Form desired shapes on ungreased cookie sheet.

5. Bake at 400°F for 7-8 minutes or until just starting to turn golden brown around the edges, being careful not to over bake.

Friday, December 11, 2009

On the Fourth Day of Cookies...

Posted by Laura at 10:09 PM 0 comments
By now, most of you know that peanut butter and chocolate are near and dear to my heart, so it should be no surprise that this is one of my favorite cookies. No holiday is complete without this great, easy cookie recipe.


Peanut Butter Blossoms

(Source: Hersheys.com)

1/2 cup shortening
3/4 cup creamy peanut butter
1/3 cup granulated sugar
1/3 cup light brown sugar
1 egg
2 Tbsp milk
1 tsp Vanilla
1 1/2 cups flour
1 tsp baking soda
1/2 tsp salt
Granulated Sugar
Hershey's Kisses


1. Preheat oven to 375°degrees. Unwrap Hershey's kisses.

2. Beat shortening and peanut butter until well-blended. Add sugars and beat until fluffy. Add egg, milk, and vanilla; beat well. Stir together flour, baking soda, and salt; gradually beat into peanut butter mixture.

3. Shape dough into 1 inch balls. Roll in granulated sugar; place on ungreased cookie sheet.

4. Bake 8-10 minutes or until lightly browned. Immediately press a peanut butter cup into center of each cookie; cookie will crack around edges. Remove from cookie sheet to wire rack. Cool completely.

Makes about 4 dozen.

Tuesday, December 8, 2009

On the Second Day of Cookies...

Posted by Laura at 8:38 PM 0 comments
If you are unfamiliar with these cookies, they are of German origin, very spicy, with molasses and black pepper in them. The translation of Pfeffernussen is “pepper nuts”, although my recipe doesn’t call for nuts I understand that some do. The snowy sugar surface of Pfeffernussen contrasts nicely with the spicy, sweet, soft, crisp crust of the cookie. A perfect addition to your holiday spread.


Pfeffernussen
(Source: Martha Stewart)

1 1/4 cups confectioners' sugar
2 1/4 cups all-purpose flour
1/4 teaspoon freshly ground pepper
3/4 teaspoon ground cinnamon
1/2 teaspoon ground allspice
1/4 teaspoon freshly ground nutmeg
1/4 teaspoon ground cloves
1/4 teaspoon baking soda
1/2 cup (1 stick) unsalted butter, room temperature
3/4 cup firmly packed light-brown sugar
1 large egg
1/4 cup unsulfured molasses
1/2 teaspoon pure vanilla extract


1. Preheat oven to 350 degrees. Line two baking sheets with parchment paper. Place the confectioners' sugar in a brown paper bag.

2. In a medium bowl, combine flour, pepper, cinnamon, allspice, nutmeg, cloves, and baking soda. Set aside.

3. Place butter, brown sugar, and molasses in the bowl of an electric mixer fitted with paddle attachment. Beat on medium speed until fluffy, about 3 minutes. Beat in egg and vanilla. With mixer on low speed, add flour mixture; beat until just combined. Pinch off dough in tablespoon amounts; roll into 1 1/4-inch balls. Arrange balls 1 1/2 inches apart on prepared baking sheets. (Dough can be frozen at this point, covered tightly with plastic wrap, up to 1 month.)

4. Bake until cookies are golden and firm to the touch with slight cracking, about 15 minutes, rotating sheets halfway through. Transfer sheets to a wire rack to cool slightly, about 10 minutes. Working in batches, place cookies in paper bag; shake until well coated. Let cool completely on wire rack. Store in an airtight container.

Sunday, December 6, 2009

Raspberry Truffle Tart

Posted by Laura at 10:18 AM 1 comments
We had a few friends over last night to drink a few bottles of wine shipped to us from California. When we were out in California with some friends this summer, we joined a wine club at our favorite winery, August Briggs (Hubby and I visited the winery while on our honeymoon in July 2007 and insisted we make it one of our stops this summer). The dinner menu consisted of steaks, scalloped potatoes, Caesar salad, and, of course, dessert!

When contemplating dessert, we decided that nothing goes better with wine than chocolate. This tart is pure indulgence and paired perfectly with the wine. What could be more enticing than a giant raspberry-flavored truffle set in a biscotti crust? Nothing, I tell you. Nothing. Photo coming soon!

Rasberry Truffle Tart
(Source: Joy of Baking)

Biscotti Crust:
80z biscotti, broken into small pieces
5 -6 Tbsp butter, melted

Filling:
1/3 cup raspberry sauce (recipe follows)
10 oz semi sweet or bittersweet chocolate, chopped
1 cup heavy whipping cream

Raspberry Sauce:
1 cup fresh or frozen raspberries
2 Tbsp sugar, to taste

Garnish:
Fresh Raspberries


1. Preheat the oven to 350°F. Have ready a 8 - 9 inch (20 - 23 cm) fluted tart pan.

2. In your food processor, place the biscotti and process until finely ground. Transfer to a bowl and add the melted butter. Stir to combine. Press this mixture over the bottom and up the sides of the tart pan.

3. Bake in the preheated oven for about 15 minutes or until golden brown. Remove from oven and place on a wire rack to cool completely before adding the filling.

4. Place 1 cup of fresh or frozen raspberries, that have been thawed, in your food processor and process until the raspberries are broken up. Pour into a strainer, set over a bowl, and press on the raspberries to extract the juice. Add sugar to taste. Set aside.

5. Place the chopped chocolate in a medium sized stainless steel bowl. Set aside. Heat the cream in a saucepan over medium heat. Bring just to a boil. Immediately pour the boiling cream over the chocolate and allow to stand for 5 minutes. Stir until smooth. Stir in 1/3 cup of the raspberry sauce.

6. Pour the chocolate filling into the baked and cooled crust, smoothing the top with an offset spatula. Cover and refrigerate overnight.

To Serve: Cut into small slices and serve with fresh raspberries and with any of the remaining raspberry sauce.

Makes one - 8 - 9 inch (20 - 23 cm) tart.
 

Laura's Sweet Treats Copyright 2009 Sweet Cupcake Designed by Ipiet Templates Image by Tadpole's Notez